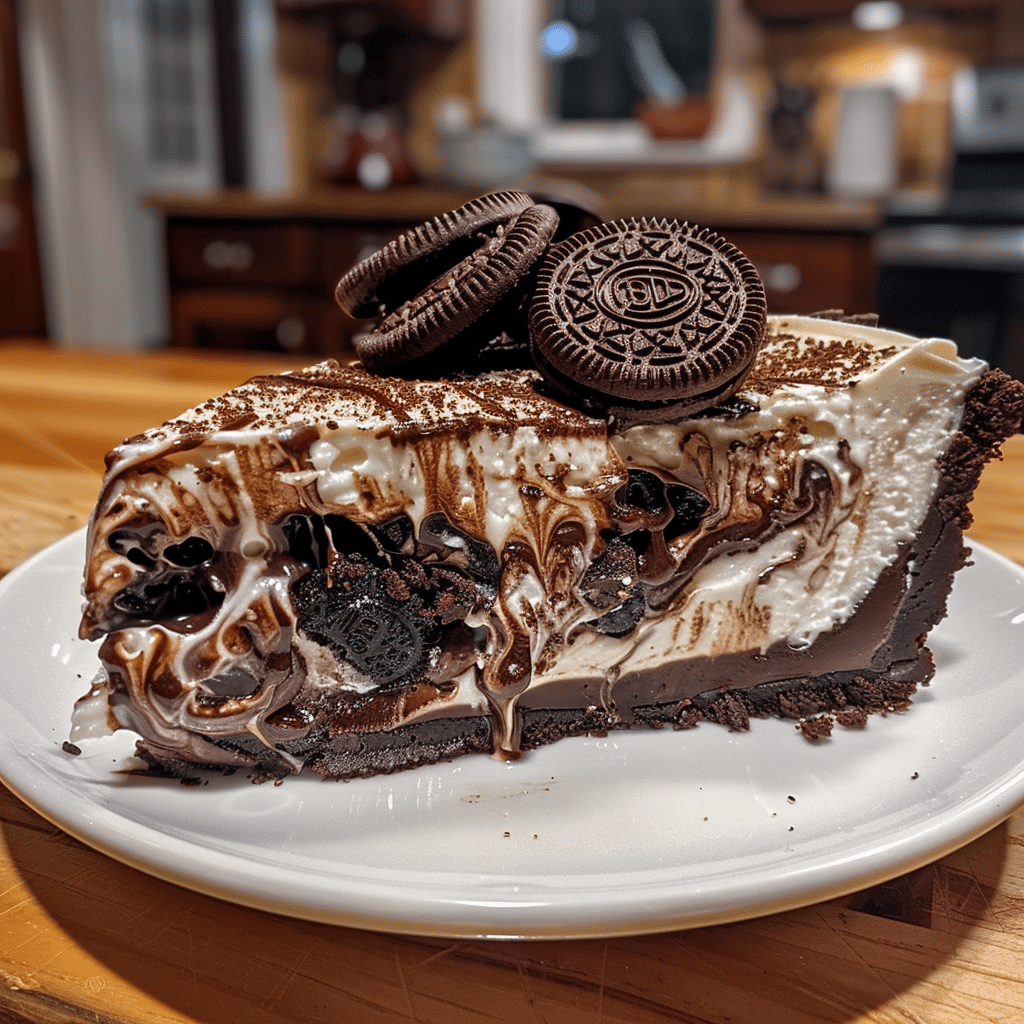
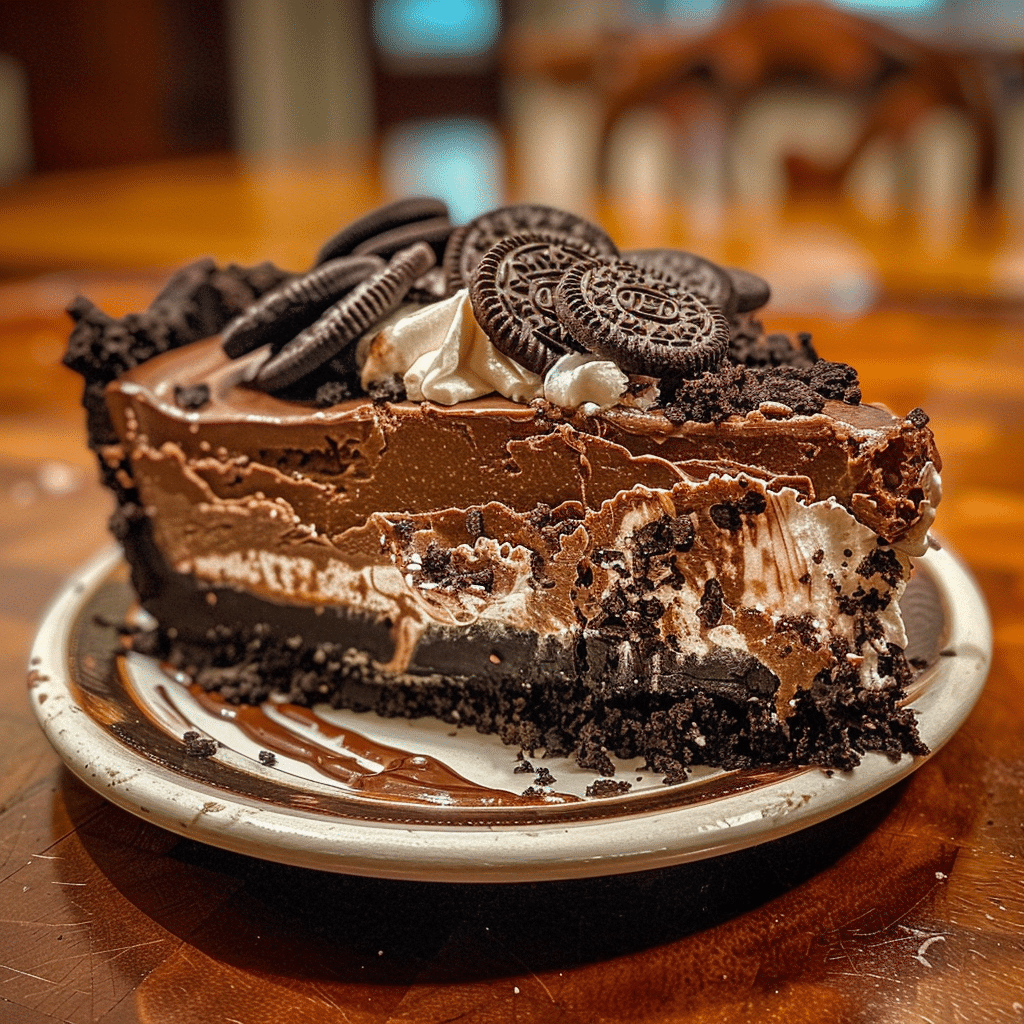
When the weather heats up, nothing beats the rich, frozen indulgence of a Frozen Chocolate Oreo Mud Pie. Imagine layers of crushed Oreos, velvety chocolate ice cream, luscious fudge sauce, and fluffy whipped topping all in one irresistible dessert. It’s creamy, crunchy, and utterly satisfying—like a slice of pure summer joy. The best part? It’s a no-bake recipe that looks and tastes like something straight from a dessert café. I first made this for a family barbecue, and it disappeared before dinner even started. Each layer complements the next perfectly—the buttery cookie crust, the cool chocolate center, and the silky fudge drizzle on top. It’s the kind of dessert that makes you smile from the very first bite.
Why You’ll Love This Recipe
This Frozen Chocolate Oreo Mud Pie is the ultimate crowd-pleaser. It’s simple to assemble, requires no oven time, and can be prepared ahead of time for stress-free entertaining. Every layer brings something different: the crunch of Oreos, the creaminess of ice cream, and the richness of fudge sauce. Whether you’re serving it at a summer cookout, holiday dinner, or just a weekend treat, it’s guaranteed to impress.
Print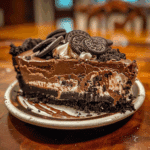
Frozen Chocolate Oreo Mud Pie Recipe: A Cool, Creamy Dessert Dream
- Total Time: 4 hours 20 minutes (including freezing time)
- Yield: 8 servings
- Diet: Vegetarian
Description
This Frozen Chocolate Oreo Mud Pie is a rich and creamy no-bake dessert featuring an Oreo cookie crust, layers of chocolate fudge, ice cream, and whipped topping — the ultimate frozen treat for chocolate lovers.
Ingredients
- 24 Oreo cookies, finely crushed
- 1/4 cup unsalted butter, melted
- 1/2 gallon chocolate or cookies & cream ice cream, softened
- 1 cup hot fudge sauce, warmed slightly
- 1 cup whipped topping (such as Cool Whip)
- 1/4 cup mini chocolate chips or crushed Oreos (for garnish)
- Chocolate shavings or drizzle (optional)
Instructions
- In a bowl, mix crushed Oreo cookies with melted butter until well combined.
- Press the mixture firmly into the bottom and up the sides of a 9-inch pie dish to form the crust. Freeze for 15 minutes to set.
- Spread half of the softened ice cream evenly over the chilled crust.
- Drizzle half of the warm fudge sauce over the ice cream layer and spread gently.
- Top with the remaining ice cream and smooth the surface.
- Drizzle the rest of the fudge sauce on top, then spread whipped topping evenly over the pie.
- Sprinkle with mini chocolate chips or crushed Oreos for garnish.
- Cover and freeze for at least 4 hours, or until firm.
- Before serving, let the pie sit at room temperature for 10–15 minutes for easier slicing.
Notes
- You can use any flavor of ice cream you like — mint chocolate chip or peanut butter cup works great too.
- For a homemade touch, make your own whipped cream instead of store-bought.
- Store covered in the freezer for up to 1 week.
- Serve with extra hot fudge or caramel drizzle for an indulgent touch.
- Prep Time: 20 minutes
- Cook Time: 0 minutes
- Category: Dessert
- Method: No-Bake
- Cuisine: American
Ingredients
(Tip: You can find the complete list of ingredients and their measurements in the recipe card below.)
Oreo cookies: The base of the dessert. Crushed Oreos create a perfectly chocolatey, crumbly crust with just the right texture. You can use regular or double-stuffed depending on how indulgent you want it.
Butter: Melted and mixed with the Oreo crumbs to hold the crust together. I once tried using browned butter—it added a nutty aroma that made it even better.
Chocolate ice cream: The creamy heart of the pie. Use a premium brand for maximum flavor, or try chocolate fudge or mocha for a twist.
Hot fudge sauce: Adds a rich, glossy layer of chocolatey goodness. Slightly warming it before spreading helps create a smooth finish.
Whipped topping: Lightens the dessert and gives it that airy, creamy top layer. Homemade whipped cream works just as well if you prefer a richer texture.
Chocolate chips or curls: For garnish, adding texture and visual appeal. I love using a mix of milk and dark chocolate for contrast.
Crushed Oreos (for topping): Adds extra crunch and makes the presentation even more tempting.
Optional toppings: Caramel drizzle, chopped nuts, or mini marshmallows for a fun twist.
Directions
Start by preparing the crust. In a food processor, pulse the Oreos into fine crumbs. Reserve about ½ cup for topping. Mix the remaining crumbs with melted butter until well combined. Press the mixture firmly into the bottom and slightly up the sides of a 9-inch pie dish. Freeze for 15 minutes to set.
Remove the chocolate ice cream from the freezer and let it soften slightly for easier spreading. Spoon the ice cream over the Oreo crust, smoothing it into an even layer. Place the pie back in the freezer for 30 minutes to firm up.
Warm the hot fudge sauce slightly and pour a generous layer over the ice cream. Spread evenly, then freeze again for 15–20 minutes to allow it to set. Once firm, spread a thick layer of whipped topping over the fudge layer, smoothing the top with a spatula.
Sprinkle the remaining crushed Oreos and chocolate chips on top. Freeze the pie for at least 4 hours or until completely firm.
Before serving, drizzle with extra fudge or caramel sauce and let it sit at room temperature for 5 minutes to soften slightly for slicing. The first bite—cool, creamy, and chocolatey—is pure bliss.
Equipment needed :
Must-Have Tools to Get Rolling
Here’s what you’ll want to have on hand:
Silicone Spatula – Durable, heat-resistant silicone spatula perfect for mixing, scraping, and spreading. Gentle on non-stick cookware and easy to clean.
Large pot – You’ll need this to boil the whole cabbage head and soften the leaves.
large bowl –Spacious, durable large bowl ideal for mixing, serving, or food preparation. Made from sturdy material and easy to clean.
Sharp knife – For coring the cabbage and slicing out the thick stem in each leaf. A paring knife works best.
Mixing bowl – A big bowl makes it easier to combine your meat and rice filling evenly.
Cutting board – For prepping cabbage leaves and rolling them like a pro.
9×13-inch baking dish – Ideal size to fit your rolled cabbage leaves snugly and prevent them from unraveling.
knife – A sharp, durable kitchen knife perfect for slicing, chopping, and dicing with ease
Servings and timing
This recipe serves 8–10 people and takes around 20 minutes to assemble, plus at least 4 hours of freezing time (or overnight for best results).
Storage/reheating
Keep the pie covered tightly with plastic wrap or aluminum foil in the freezer for up to 2 weeks. Slice straight from the freezer and let sit at room temperature for 5 minutes before serving. Avoid thawing completely, as the texture will soften too much.
Variations and Customizations
Peanut Butter Oreo Mud Pie: Swirl peanut butter into the fudge layer or use peanut butter ice cream for a nutty variation.
Mint Chocolate Mud Pie: Substitute mint chocolate chip ice cream and top with crushed mint Oreos for a refreshing twist.
Caramel Delight: Drizzle caramel sauce between the ice cream and fudge layers for extra richness.
Mocha Mud Pie: Add a teaspoon of instant espresso powder to the fudge sauce for a coffee-infused flavor.
Cookies and Cream Version: Use cookies and cream ice cream and extra Oreo chunks throughout the layers.
Nutty Crunch: Sprinkle chopped pecans, almonds, or peanuts over the top for added texture.
Triple Chocolate Dream: Combine milk, dark, and white chocolate layers for an extra-decadent dessert.
Mini Mud Pies: Assemble individual servings in small ramekins or muffin tins for parties or portion control.
FAQs
Can I make this ahead of time?
Yes, it’s perfect for make-ahead entertaining—just keep it frozen until ready to serve.
Can I use a store-bought crust?
Absolutely. A pre-made Oreo crust works well if you’re short on time.
What’s the best ice cream to use?
High-quality chocolate or fudge ice cream makes the richest, creamiest mud pie.
Can I use homemade whipped cream?
Yes, just stabilize it slightly with powdered sugar so it holds up in the freezer.
How do I get clean slices?
Dip a sharp knife in hot water and wipe it between cuts for smooth, neat slices.
Can I add caramel sauce?
Definitely—it pairs beautifully with chocolate and Oreos.
How long should I freeze before serving?
At least 4 hours, but overnight gives the best texture and firmness.
Can I make it dairy-free?
Yes, use dairy-free ice cream, whipped topping, and vegan butter substitutes.
How do I prevent freezer burn?
Wrap tightly in plastic wrap and aluminum foil to seal out air.
Can I use a rectangular pan instead of a pie dish?
Yes, an 8×8-inch or 9×9-inch pan works perfectly—just layer the same way.
Conclusion
Frozen Chocolate Oreo Mud Pie is the perfect no-bake dessert for chocolate lovers. With its creamy layers, crunchy Oreo crust, and silky fudge topping, it’s indulgent yet easy to make. Every bite offers a cool contrast of textures and flavors—sweet, smooth, and satisfyingly rich. Whether you make it for a summer celebration or a simple family treat, this dessert never fails to impress. I’ve served it countless times, and every slice disappears in moments. Once you make it, you’ll find yourself coming back to this recipe again and again—it’s that good.
Hungry for more? Visit our website for full recipes and follow us on Pinterest for daily foodie inspo you’ll love to pin!