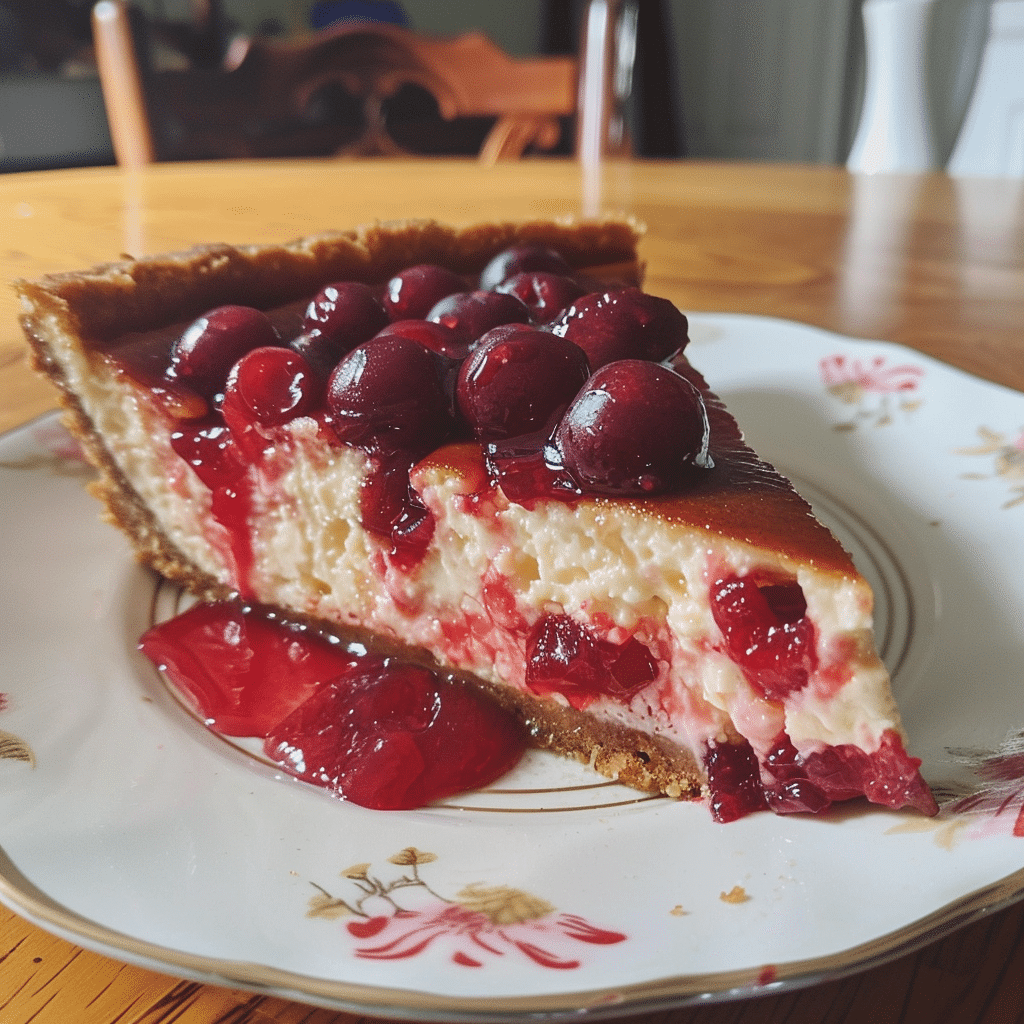
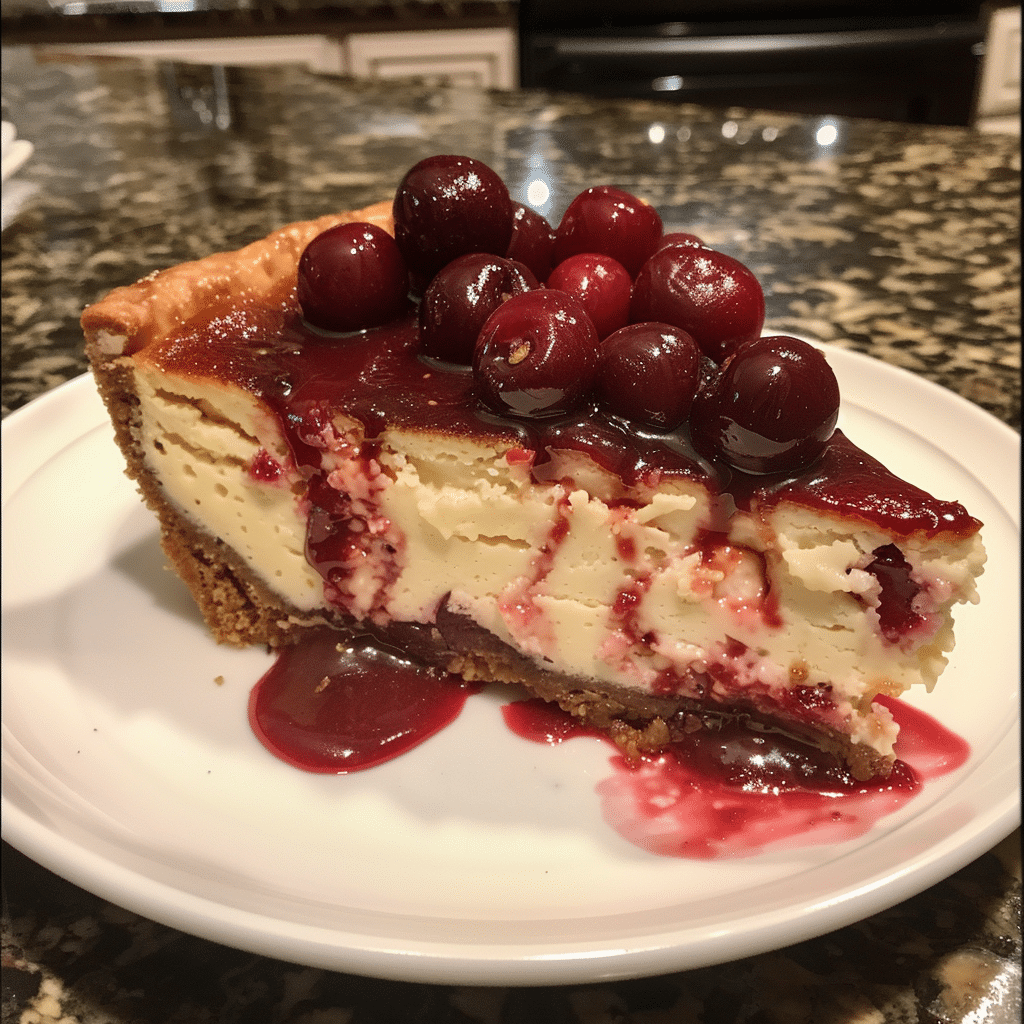
If you’re looking for a dessert that’s indulgent, unforgettable, and guaranteed to impress, Cherry Fried Cheesecake is it. This treat combines the creamy luxury of cheesecake with the crispy golden crunch of fried pastry — all topped with a luscious cherry sauce. It’s the ultimate fusion of creamy and crunchy, sweet and tangy. The first time I tried making this, I used homemade cherry compote instead of canned filling, and the freshness took it to another level. Whether you’re preparing it for a dinner party, special occasion, or just a weekend indulgence, this dessert is surprisingly easy to make and impossible to resist. Every bite delivers that rich cheesecake flavor encased in a warm, crispy shell, perfectly balanced by the tart cherry topping.
Print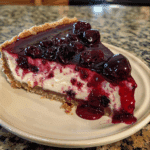
Cherry Fried Cheesecake: A Crispy, Creamy Dessert Dream
- Total Time: 25 mins
- Yield: 6 servings
- Diet: Vegetarian
Description
A decadent dessert featuring creamy cheesecake filling wrapped in a crispy fried shell, topped with sweet cherry pie filling for the ultimate indulgence.
Ingredients
- 8 oz cream cheese, softened
- 1/4 cup sugar
- 1/2 tsp vanilla extract
- 1/4 cup sour cream
- 1/2 cup cherry pie filling
- 6 small flour tortillas or egg roll wrappers
- 1 egg, beaten (for sealing)
- Vegetable oil, for frying
- Powdered sugar, for dusting
Instructions
- In a bowl, beat cream cheese, sugar, vanilla extract, and sour cream until smooth and creamy.
- Lay out a tortilla or wrapper and spoon 2 tablespoons of the cheesecake mixture in the center.
- Fold in the sides and roll tightly, sealing the edges with beaten egg.
- Heat oil in a deep pan to 350°F (175°C).
- Fry the rolls for 2–3 minutes per side, or until golden brown and crispy.
- Remove and drain on paper towels.
- Top with cherry pie filling and dust with powdered sugar.
- Serve warm with whipped cream or vanilla ice cream if desired.
Notes
- Ensure the oil is hot enough to prevent soggy rolls.
- Can be made ahead and fried just before serving.
- Try using blueberry or strawberry pie filling for variation.
- For a baked version, brush with melted butter and bake at 375°F (190°C) for 15–18 minutes.
- Prep Time: 15 mins
- Cook Time: 10 mins
- Category: Dessert
- Method: Frying
- Cuisine: American
Why You’ll Love This Recipe
Cherry Fried Cheesecake is the perfect combination of textures and flavors — crispy on the outside, creamy in the middle, and bursting with fruity sweetness on top. It’s quick to prepare and makes a show-stopping dessert that feels restaurant-quality. The contrast between hot, fried pastry and cool, tangy cherry sauce is simply irresistible.
Ingredients
(Tip: You can find the complete list of ingredients and their measurements in the recipe card below.)
Cream Cheese: The heart of any cheesecake. Use full-fat cream cheese for that rich, smooth texture that holds up beautifully when fried.
Sugar: A small amount of granulated sugar sweetens the filling without making it overly rich.
Vanilla Extract: Adds warmth and enhances the cream cheese flavor.
Egg: Helps the filling bind together, ensuring a creamy but firm texture after chilling.
Cherry Pie Filling: The sweet, tangy cherry topping that gives this dessert its signature flavor. Homemade cherry compote works wonderfully too.
Tortillas or Phyllo Dough: Used to wrap the cheesecake filling before frying. Tortillas give a crisp, golden shell, while phyllo creates a delicate, flaky texture.
Butter: Used to brush the wraps and seal the edges for perfect frying.
Cinnamon Sugar (optional): A dusting of cinnamon sugar after frying adds extra flavor and sweetness.
Oil for Frying: Use neutral oil such as vegetable or canola oil for even frying.
Powdered Sugar (optional): For a light dusting before serving.
Directions
Start by preparing the cheesecake filling. In a bowl, beat the cream cheese, sugar, vanilla, and egg until smooth and creamy. Transfer the mixture into a small pan lined with parchment paper and bake at 325°F (160°C) for about 25 minutes until just set. Let it cool, then refrigerate for at least 2 hours or until firm.
Once chilled, cut the cheesecake into rectangles or small rounds. Place a piece of cheesecake in the center of each tortilla (or a few layers of phyllo dough). Fold the sides over the filling and roll tightly like a burrito, sealing the edges with a dab of butter or water.
Heat oil in a deep skillet to 350°F (175°C). Fry the cheesecake rolls until golden brown on all sides, about 1–2 minutes per side. Remove and drain on paper towels.
Dust with cinnamon sugar or powdered sugar if desired. Serve warm, topped generously with cherry pie filling. You can also drizzle melted white chocolate or whipped cream for an extra decadent touch.
Equipment needed :
Must-Have Tools to Get Rolling
Silicone Spatula – Durable, heat-resistant silicone spatula perfect for mixing, scraping, and spreading. Gentle on non-stick cookware and easy to clean.
Large pot – You’ll need this to boil the whole cabbage head and soften the leaves.
large bowl –Spacious, durable large bowl ideal for mixing, serving, or food preparation. Made from sturdy material and easy to clean.
Sharp knife – For coring the cabbage and slicing out the thick stem in each leaf. A paring knife works best.
Mixing bowl – A big bowl makes it easier to combine your meat and rice filling evenly.
Cutting board – For prepping cabbage leaves and rolling them like a pro.
9×13-inch baking dish – Ideal size to fit your rolled cabbage leaves snugly and prevent them from unraveling.
knife – A sharp, durable kitchen knife perfect for slicing, chopping, and dicing with easeServings and timing
This recipe makes 8 servings and takes about 50 minutes total — 10 minutes of prep and 40 minutes of baking. Perfect for a quick yet elegant dessert.Storage/reheating
Store leftover cake in an airtight container at room temperature for up to 3 days. For longer storage, refrigerate for up to 5 days or freeze for up to 2 months. To serve, warm individual slices in the microwave for 10–15 seconds to restore their soft texture.
Servings and timing
This recipe makes 6 servings and takes about 1 hour 15 minutes total — including 30 minutes of prep, 25 minutes of baking, and 10 minutes of frying.
Storage/reheating
Store any leftover fried cheesecakes in an airtight container in the refrigerator for up to 3 days. To reheat, place them in an oven or air fryer at 325°F (160°C) for 5–7 minutes to restore crispiness. Avoid microwaving — it will make the crust soggy. The cherry topping can be stored separately and spooned over just before serving.
Variations and Customizations
Chocolate Cherry Cheesecake Rolls – Add a layer of chocolate chips or drizzle melted dark chocolate over the top.
Berry Medley Topping – Replace cherry filling with a mix of blueberries, raspberries, and strawberries.
Nutty Crunch Version – Sprinkle chopped pecans or almonds over the filling before rolling.
Cinnamon Swirl Cheesecake – Add ground cinnamon to the filling for a warm, spiced note.
Mini Bites – Cut the cheesecake into small cubes and wrap individually for bite-sized treats.
Baked Version – Instead of frying, brush with butter and bake at 375°F (190°C) for 15–18 minutes until golden.
White Chocolate Cherry Rolls – Mix white chocolate chips into the filling for a creamy, sweet twist.
Tropical Cheesecake Rolls – Swap cherries for pineapple or mango compote for a summery version.
Caramel Drizzle Delight – Drizzle salted caramel over the fried cheesecake before serving.
No-Bake Shortcut – Use store-bought cheesecake slices for an ultra-quick version; just wrap, fry, and top.
FAQs
1. Can I use store-bought cheesecake for this recipe?
Yes, it’s a great shortcut and saves baking time. Just chill it well before wrapping.
2. What oil is best for frying?
Vegetable or canola oil works best for even frying and neutral flavor.
3. Can I air-fry these instead of deep-frying?
Absolutely — air fry at 375°F (190°C) for 6–8 minutes until golden and crisp.
4. Can I freeze the cheesecake rolls before frying?
Yes, freeze them wrapped individually, then fry straight from frozen.
5. How do I prevent the filling from leaking?
Make sure the edges are sealed tightly and don’t overfill.
Conclusion
Cherry Fried Cheesecake is a dessert lover’s dream — crisp on the outside, creamy inside, and crowned with a tangy cherry topping. It’s indulgent, elegant, and surprisingly simple to make at home. Whether you’re serving it at a party or treating yourself to something special, this dessert delivers on both flavor and texture. Once you try it, you’ll see why it’s impossible to stop at just one piece.
Hungry for more? Visit our website for full recipes and follow us on Pinterest for daily foodie inspo you’ll love to pin!