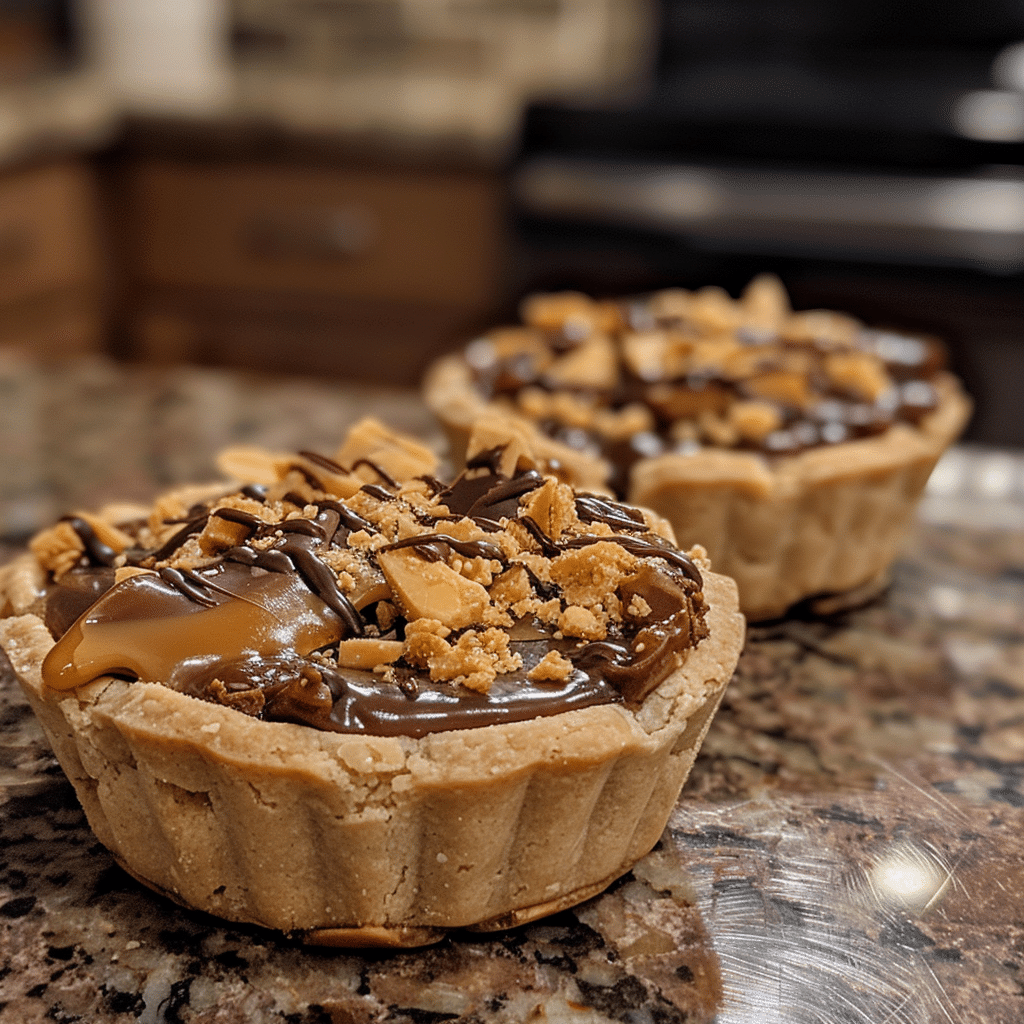
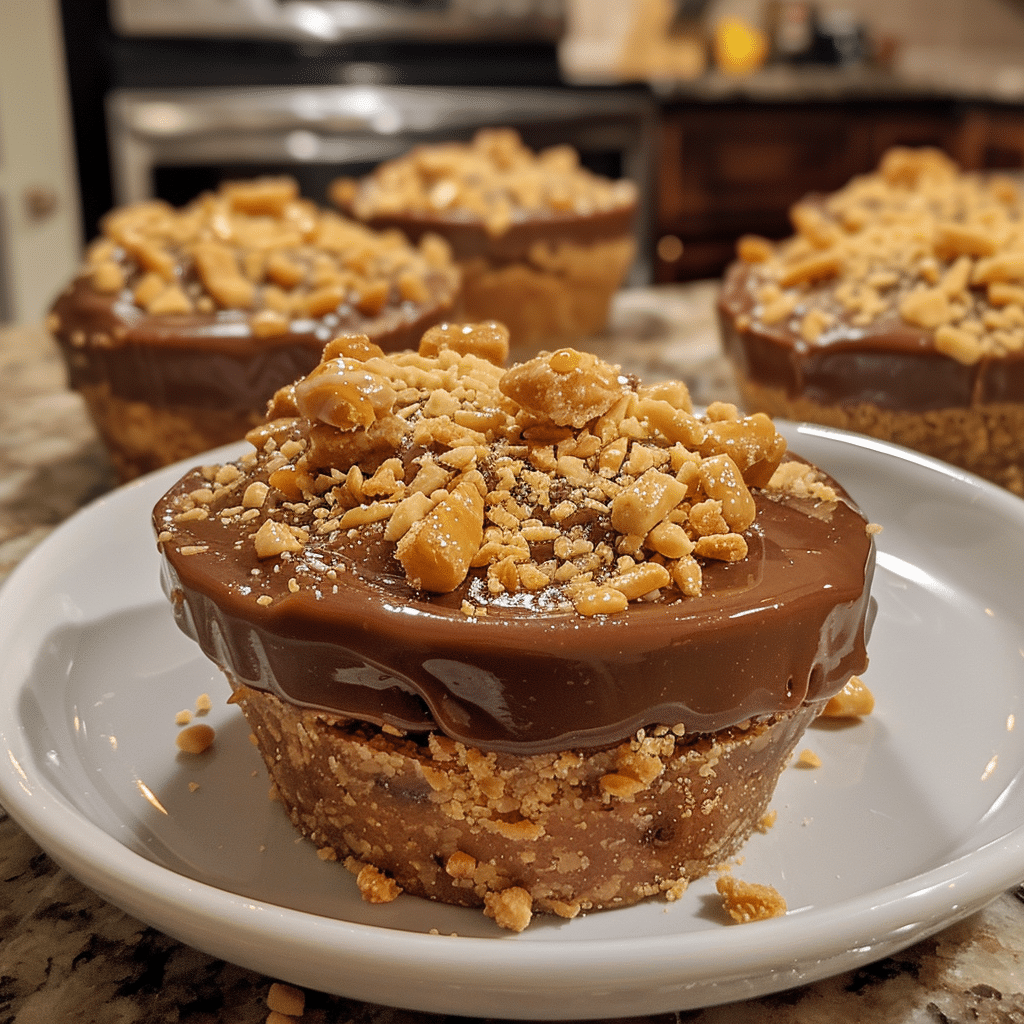
If you’re looking for a dessert that’s as fun to make as it is to eat, Butterfinger Caramel Crunch Mini Pies are your new go-to. These individual-sized treats combine the best of everything — buttery crusts, silky caramel filling, whipped cream, and a crunchy Butterfinger topping that adds the perfect candy-bar finish. They’re rich yet perfectly portioned, making them ideal for parties, holidays, or just when you want something indulgent but not over the top. I tried making these with both graham cracker and Oreo crusts, and both versions were outstanding — the graham version brings out the caramel, while the Oreo gives that extra chocolate punch. Each bite offers creamy, crunchy, and caramel-sweet satisfaction that’s impossible to resist.
Why You’ll Love This Recipe
Butterfinger Caramel Crunch Mini Pies bring together the nostalgia of candy-bar flavors with the elegance of mini desserts. The contrast between creamy caramel and the crispy Butterfinger bits makes these pies unforgettable. They’re no-bake, easy to prepare, and require minimal ingredients — perfect for busy days or last-minute gatherings. Best of all, you can customize the crust or toppings to suit your taste. These little pies are guaranteed crowd-pleasers that look as impressive as they taste.
Print
Butterfinger Caramel Crunch Mini Pies – Irresistibly Sweet, Creamy, and Crunchy
- Total Time: 2 hrs 15 mins (including chilling)
- Yield: 6 mini pies
- Diet: Vegetarian
Description
Butterfinger Caramel Crunch Mini Pies are irresistible no-bake desserts made with a buttery graham cracker crust, creamy caramel-peanut butter filling, and a crunchy Butterfinger topping. These mini treats are sweet, salty, and packed with candy-bar flavor — perfect for parties or individual indulgence.
Ingredients
- 6 mini graham cracker pie crusts (store-bought or homemade)
- 1 (8 oz) package cream cheese, softened
- 1/2 cup creamy peanut butter
- 1/2 cup caramel sauce (plus more for drizzling)
- 1/2 cup powdered sugar
- 1 tsp vanilla extract
- 1 (8 oz) container whipped topping, thawed
- 4 Butterfinger candy bars, crushed (divided)
- Whipped cream and extra caramel for garnish (optional)
Instructions
- In a medium bowl, beat together cream cheese, peanut butter, and powdered sugar until smooth and creamy.
- Add caramel sauce and vanilla extract, mixing until fully combined.
- Fold in the whipped topping until light and fluffy.
- Gently stir in half of the crushed Butterfingers, reserving the rest for topping.
- Spoon the filling evenly into the mini pie crusts and smooth the tops with a spatula.
- Refrigerate for at least 2 hours (or up to overnight) to set.
- Before serving, drizzle with caramel sauce, top with whipped cream, and sprinkle with remaining crushed Butterfingers.
- Serve chilled and enjoy!
Notes
- Use full-size graham cracker crusts for a full pie version.
- For a richer caramel flavor, use homemade salted caramel sauce.
- These pies freeze well — thaw slightly before serving for a frozen treat.
- Swap Butterfingers with Reese’s Cups or Snickers for fun variations.
- Prep Time: 15 mins
- Cook Time: 0 mins
- Category: Dessert
- Method: No-Bake
- Cuisine: American
Ingredients
(Tip: You can find the complete list of ingredients and their measurements in the recipe card below.)
Mini pie crusts – You can use store-bought graham cracker or chocolate cookie crusts. Both pair beautifully with the caramel and candy flavors.
Caramel sauce – The heart of the filling. Use thick, buttery caramel for a rich texture. I tried both homemade and store-bought versions; homemade adds an extra layer of flavor, but either works perfectly.
Cream cheese – Softened cream cheese forms the creamy base of the filling, adding a slight tang to balance the sweetness.
Whipped topping (or whipped cream) – Adds lightness and makes the filling silky smooth.
Butterfinger candy bars – Crushed into small pieces, they provide crunch and that iconic peanut-buttery flavor.
Powdered sugar – Adds sweetness and helps stabilize the creamy filling.
Vanilla extract – Rounds out the flavors and enhances the caramel.
Chocolate syrup (optional) – For drizzling over the top before serving, adding an extra touch of indulgence.
Sea salt (optional) – A sprinkle of sea salt enhances the caramel’s flavor and balances the sweetness.
Directions
In a medium mixing bowl, beat softened cream cheese and powdered sugar until smooth and creamy. Add the caramel sauce and vanilla extract, mixing until fully combined. Gently fold in half of the whipped topping until the mixture is light and airy.
Spoon the caramel cream mixture evenly into the mini pie crusts, smoothing the tops with a spatula. Chill for at least 1 hour to let the filling set. Just before serving, top each mini pie with a dollop of whipped topping, a drizzle of caramel or chocolate syrup, and a generous sprinkle of crushed Butterfinger pieces.
For extra crunch, I like to reserve a few larger Butterfinger chunks to scatter over the top right before serving. If you’re preparing these ahead of time, store them covered in the refrigerator and add the toppings just before serving to keep the candy crisp.
Equipment needed :
Must-Have Tools to Get Rolling
Here’s what you’ll want to have on hand:
Silicone Spatula – Durable, heat-resistant silicone spatula perfect for mixing, scraping, and spreading. Gentle on non-stick cookware and easy to clean.
Large pot – You’ll need this to boil the whole cabbage head and soften the leaves.
large bowl –Spacious, durable large bowl ideal for mixing, serving, or food preparation. Made from sturdy material and easy to clean.
Sharp knife – For coring the cabbage and slicing out the thick stem in each leaf. A paring knife works best.
Mixing bowl – A big bowl makes it easier to combine your meat and rice filling evenly.
Cutting board – For prepping cabbage leaves and rolling them like a pro.
9×13-inch baking dish – Ideal size to fit your rolled cabbage leaves snugly and prevent them from unraveling.
knife – A sharp, durable kitchen knife perfect for slicing, chopping, and dicing with ease
Servings and timing
This recipe makes 6 mini pies and takes about 15 minutes to prepare, plus 1 hour of chilling time before serving.
Storage/reheating
Store leftover mini pies in the refrigerator, covered, for up to 3 days. The texture remains best when fresh, but they still taste great after a day or two. Avoid freezing, as the whipped topping and caramel may separate upon thawing.
Variations and Customizations
Peanut Butter Lover’s Dream
Add a spoonful of creamy peanut butter to the filling for a richer, nuttier flavor.
Oreo Crust Delight
Use Oreo crusts instead of graham crackers for a chocolate twist that pairs beautifully with caramel.
Salted Caramel Upgrade
Sprinkle each pie with flaky sea salt for a sweet-salty balance.
Mocha Caramel Pies
Add a teaspoon of instant espresso powder to the filling for a hint of coffee flavor.
Snickers-Inspired Version
Swap Butterfinger bits for chopped Snickers and drizzle with chocolate and peanut butter sauce.
Coconut Crunch
Top with toasted coconut flakes for a tropical touch.
Mini Tart Presentation
Use a mini tart pan instead of pre-made crusts for a more refined presentation.
Frozen Caramel Pies
Freeze the pies for 30–45 minutes before serving for a refreshing, ice cream-like texture.
Brownie Base Twist
Layer the caramel cream on top of small brownie rounds for a decadent bite-sized dessert.
Candy Bar Mix-Up
Combine Butterfinger, Reese’s, and Twix pieces for a mixed candy-bar explosion.
FAQs
Can I make these mini pies ahead of time?
Yes, they can be made up to a day in advance. Just add the Butterfinger topping before serving.
What kind of caramel sauce works best?
A thick, buttery caramel sauce (either homemade or store-bought) works perfectly. Avoid thin syrup-style versions.
Can I use homemade whipped cream instead of whipped topping?
Absolutely! Fresh whipped cream gives a lighter texture and richer flavor.
Do I need to bake the crusts?
No, store-bought mini crusts are pre-baked and ready to use.
Can I make this as one large pie instead of minis?
Yes, use a 9-inch pie crust and increase the chilling time to about 2 hours.
How do I crush Butterfinger bars without making a mess?
Place them in a zip-top bag and crush with a rolling pin or the bottom of a mug.
Can I make these pies gluten-free?
Yes, use gluten-free cookie crusts and check that your candy and caramel are gluten-free.
How long should I chill them?
At least 1 hour is ideal to let the filling set nicely.
What’s the best way to serve them?
Serve chilled with a drizzle of caramel or chocolate sauce and a sprinkle of Butterfinger bits.
Can I substitute the candy for something else?
Yes, you can use Reese’s Cups, Heath Bars, or Kit Kats for a fun flavor variation.
Conclusion
Butterfinger Caramel Crunch Mini Pies are the ultimate quick-and-easy dessert for candy lovers and caramel fans alike. With their creamy filling, buttery crust, and irresistible crunch, they deliver the perfect balance of texture and flavor in every bite. These no-bake treats are elegant enough for entertaining yet simple enough for everyday indulgence — a dessert that truly proves small can be spectacular.
Hungry for more? Visit our website for full recipes and follow us on Pinterest for daily foodie inspo you’ll love to pin!